


If you’re trying to figure out how to use Dubsado for your engagement sessions, you’re not alone. Whether you’re a wedding photographer or a Dubsado Pro helping wedding photographers leverage Dubsado to the fullest extent, this one is for you. I’ve figured out a system that allows you to completely automate the booking of an engagement session as part of a wedding package, while also allowing you to track progress on the engagement session separately from the actual wedding.
As a wedding photographer, I included an engagement session in ALL of my packages. I was very much a follower of KJ Education, and I viewed the engagement session as a TOOL to make sure that my wedding couples knew EXACTLY what to expect on their wedding day. If couples chose to opt out of their engagement session, it did not affect their chosen package price at all, so again, they were encouraged to actually use it.
I share all of this to first emphasize how STANDARD my packages were, which allowed me to standardize and automate the MOST in my Dubsado workflows. I highly encourage anyone and everyone reading this to standardize your packages and pricing as much as possible so that you can spend LESS time on the admin work.
How to use Dubsado for Engagement Sessions.
I like to set things up so that you track the engagement session progress separate from the wedding, because the engagement session will need to be edited and delivered the same way as the wedding. So this means that in using Dubsado for engagement sessions, I want the engagement session project to be separate from the wedding project, but I DON’T want to do all the work of manually creating another project and applying a workflow. Instead, my clients make this happen automatically by filling out an Engagement Session Planner for me. Here’s what our end goal is:
- After booking a wedding, your workflow emails the client with a scheduler & form to ask them to schedule their engagement session
- The client fills out the scheduler and Engagement Session Planner, which creates a new project, and starts an engagement session workflow so that the project moves through your system as desired
- You save a ton of time choosing a date, time, and location for the session!!
So what is the Engagement Session Planner?
It’s a form (specifically, a lead capture), that asks the client key questions about their session. What’s their vision for it, WHERE do they want to have it, etc. This Engagement Session Planner lead capture is then attached to a scheduler, so the client is choosing their date & time, filling in a short questionnaire including selecting their location, and hitting submit. It feels very natural from their end of things, and saves you a TON of work on the backend.
Content to Create
The first thing you have to do in creating ANY Dubsado workflow, is to first create your content. Here are all of the things that you will need to make this workflow happen:
- Outside Dubsado
- Gallery in your gallery delivery system with different folders/ sections for your FAVORITE locations to shoot engagement sessions (optional)
- Forms
- Engagement Session Planner lead capture. Here’s an example of what mine looks like!
- Emails
- Send the Engagement Session Scheduler. You’ll have to come back to this one to add the link after you’ve created the scheduler. This should be something along the lines of: “Eeek! So excited for your wedding. The next step in the process is to schedule your engagement session. Go ahead and click the link below to schedule your day & time and then select your location. Let me know if you have any questions.”
- NOTE: you should NOT use the Scheduler Smart Field link! You should use the ACTUAL public scheduler link and insert it in to this email as a button. You don’t want the appointment tied to 2 projects, that would be very confusing!
- I recommend including some information in this email about LIGHT education so that your client knows what times to look for depending on the time of year they’re booking.
- Confirmation email for the scheduled engagement session
- Reminder email that the engagement session is coming up
- Send the Engagement Session Scheduler. You’ll have to come back to this one to add the link after you’ve created the scheduler. This should be something along the lines of: “Eeek! So excited for your wedding. The next step in the process is to schedule your engagement session. Go ahead and click the link below to schedule your day & time and then select your location. Let me know if you have any questions.”
- Engagement Session scheduler
- Attach Confirmation email
- Attach Engagement Session Planner
- Attach Reminder email
- Once the scheduler is created, grab the public link (pictured below, the middle icon) and then fill it into the “Send the Engagement Session Scheduler” email above.

Workflow #1: Your own main Wedding Workflow!
Add the following action to your workflow after a wedding is booked! The trigger that you use will change depending on whether you split your workflows into phases. If it’s one long wedding workflow, I might send this 1 day “after invoice installment paid”. If you start a new workflow after the client has paid, then it might be 1 day “after workflow has started”.
| ACTION | TRIGGER | CONTENT |
|---|---|---|
| Send Email | 1 day after (the wedding is booked) | Send the Engagement Session Scheduler |
Workflow #2: Engagement Part B
Payment Schedule: None
(Remember that this starts automatically because you’ve hooked it up to your Engagement Session Planner Lead Capture)
| ACTION | TRIGGER | CONTENT |
|---|---|---|
| Change Project Status | 0 hours after workflow started | Upcoming |
| Add Tag | 0 hours after workflow started | Engagement Session |
| Create To Do | 0 hours after all previous actions complete | {{client.name}} Check this off when engagement session is complete This step is necessary because this newly created project won’t know when the engagement session happens, so you have to tell it. |
| Start a workflow | 0 hours after all previous actions complete | Workflow: Post Processing (the workflow above is where you should have all of your to dos and delivery emails for sneak peeks |
Once your Part B Workflow is created…
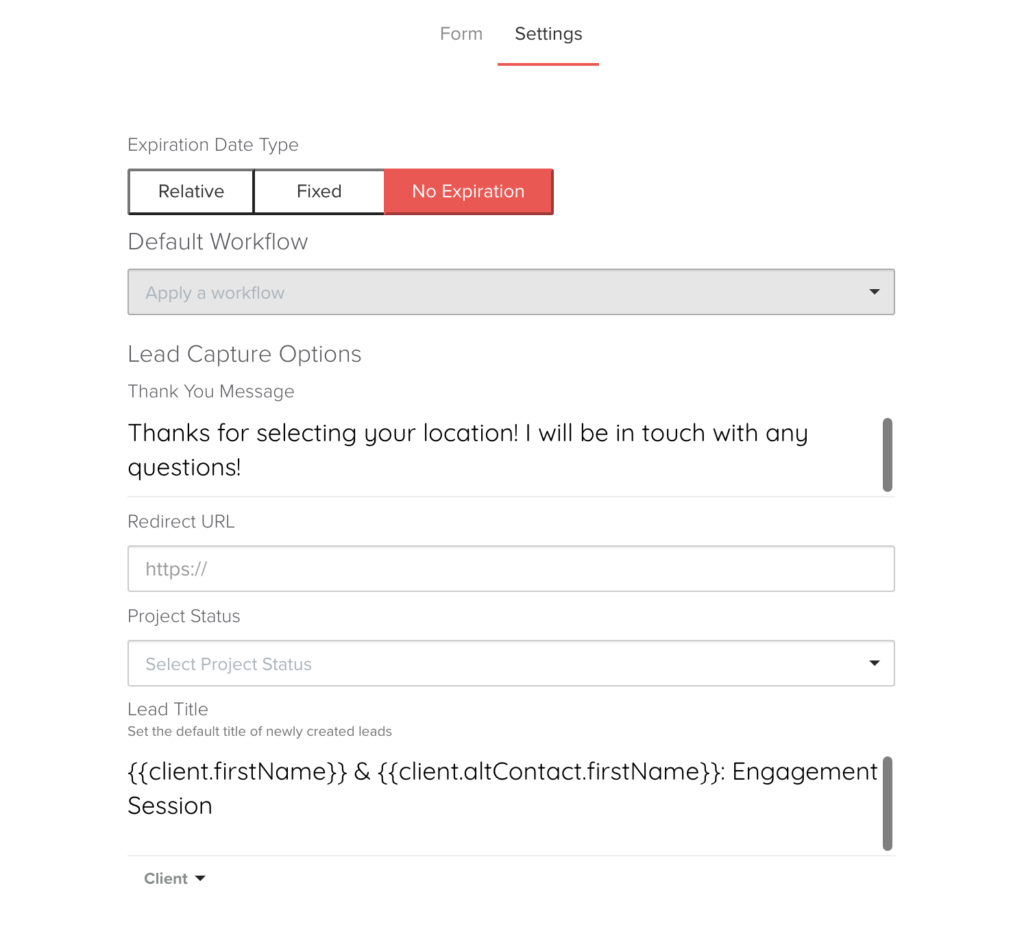
Head back to your Engagement Session Planner Lead Capture and hook up your workflow! Head to settings, and then select your “Part B” workflow in the Default Workflow field. Check out the other settings I’ve included below to see how else you might want to customize your planner!
And there you have it!
You can also apply these same principles to any package that includes multiple sessions, such as Grow With Me packages. Plus, you can apply the principles of a session planner to ANY session type, just duplicate the engagement one and drag it over so it’s a questionnaire! The goal here is that we have saved you so much time and we are assured that your client will have the opportunity to book their engagement session in a timely manner. I hope this makes your life easier!
Ongoing COO-level support to maintain and refine your systems as the business grows so operations stay steady and decisions stop piling up on your plate.

Support
Custom Dubsado, Airtable, and Moxie systems designed for capacity, not survival. Built around how your business actually runs so growth does not create more chaos.

Systems
Map, audit, or optimize the system that is slowing your business down. Workflows, offers, tech stacks, or the process that keeps living in your head instead of your business.

Strategy
These are.
Busy isn't a business plan.


In this power-packed session, I show you how to connect Airtable + your CRM for smarter tracking, simplified workflows, and insights that actually move your business forward.
From Guesswork to Growth with Airtable


You can’t automate what you don’t understand. Before you automate anything, you have to know your client journey inside and out. That’s where strategy starts - and where smart systems actually work.
What is "the client journey"?

Hot Seat, Hot Takes, Hot Damn.

Free masterclasses that show you exactly how scalable businesses are built.


© 0000 Cait Potter Creative, LLC
Privacy Statement and Terms & Conditions


